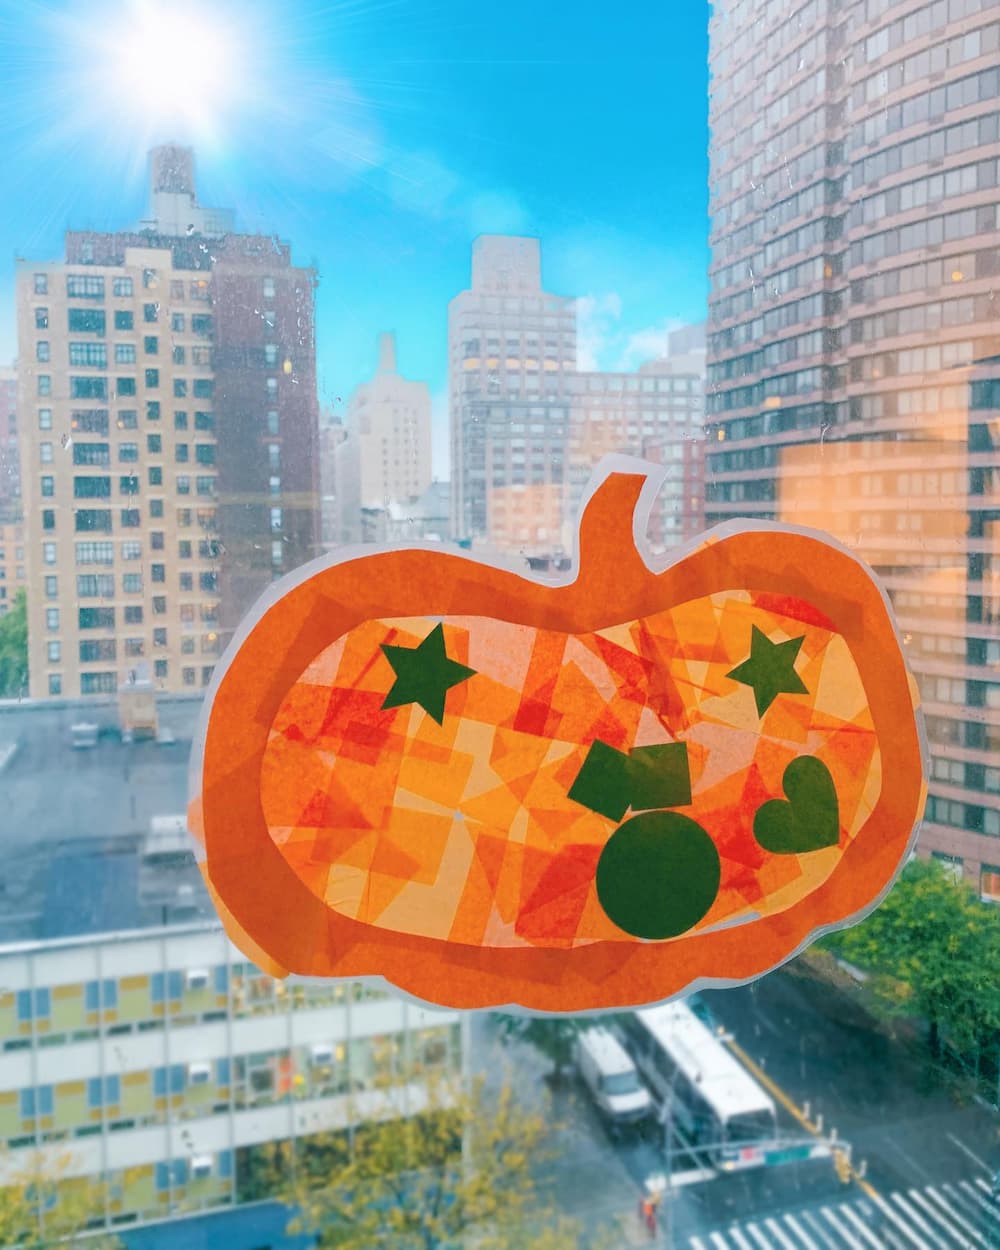
Stained Glass Pumpkin
This project is so easy and the result is beautiful! Just use contact paper to create a holiday keepsake to use every year!
Materials
- Construction paper
- One to two-inch tissue paper squares. Don’t have tissue paper squares? No problem! Cut up or have your child rip tissue paper with you!
- Contact paper—I would suggest you visit the Dollar Tree if you frequent this activity as often as I do. Grab a few rolls there.
How To
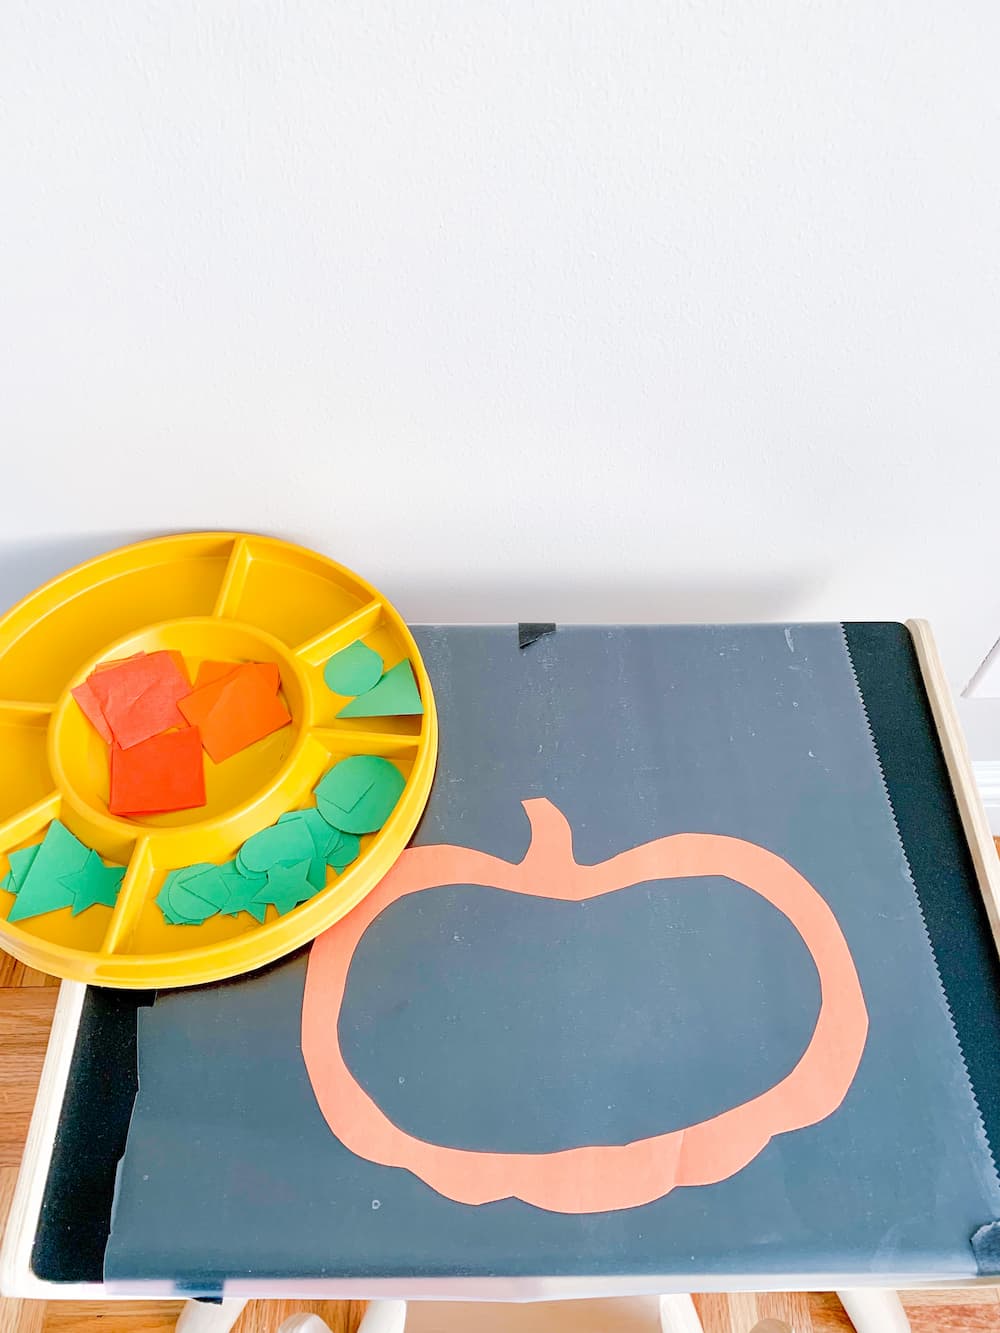
- Trace your pumpkin.
- Cut the inside out, leaving about an inch of a border.
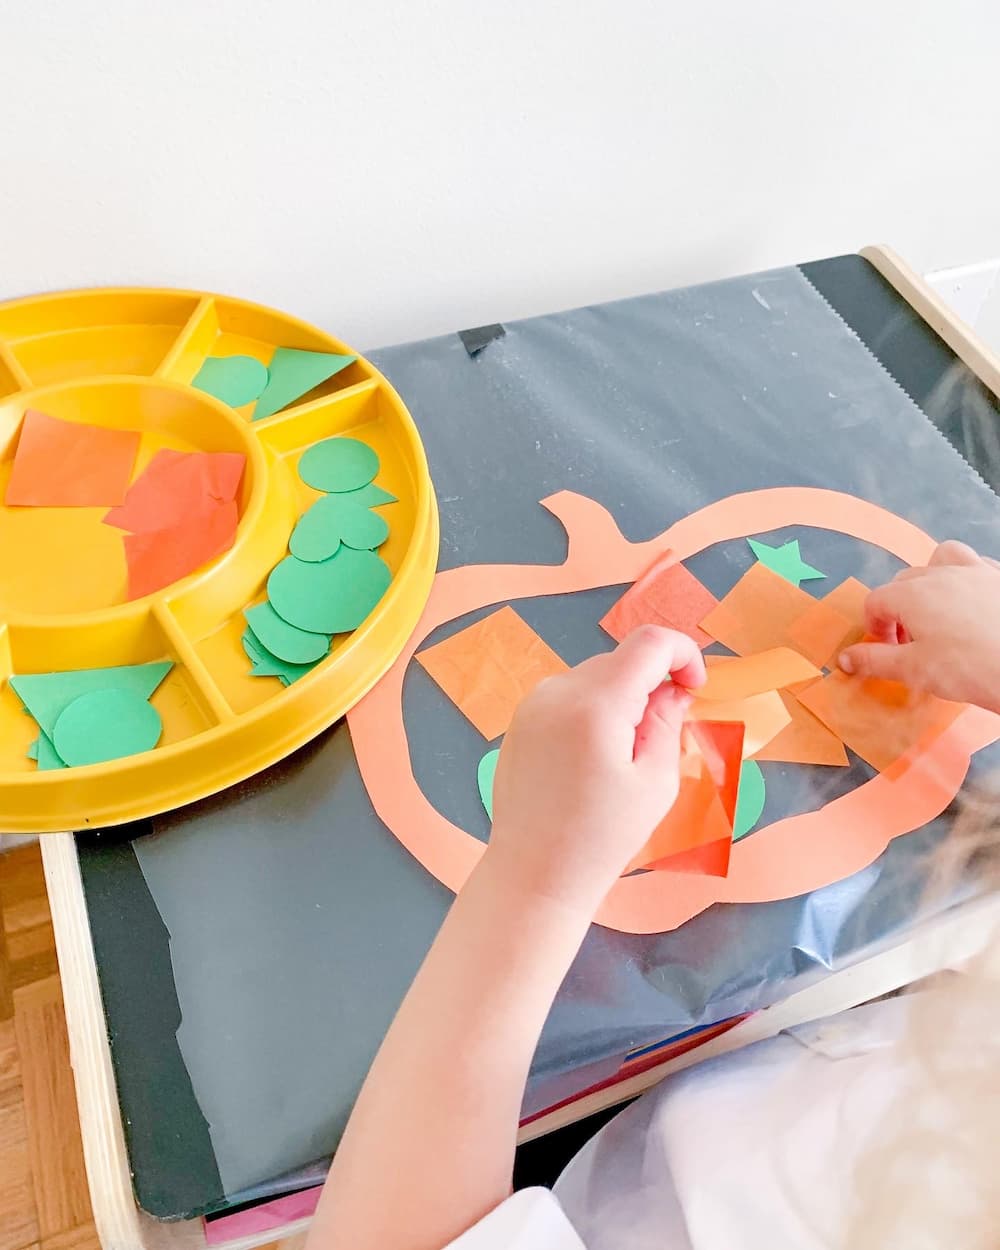
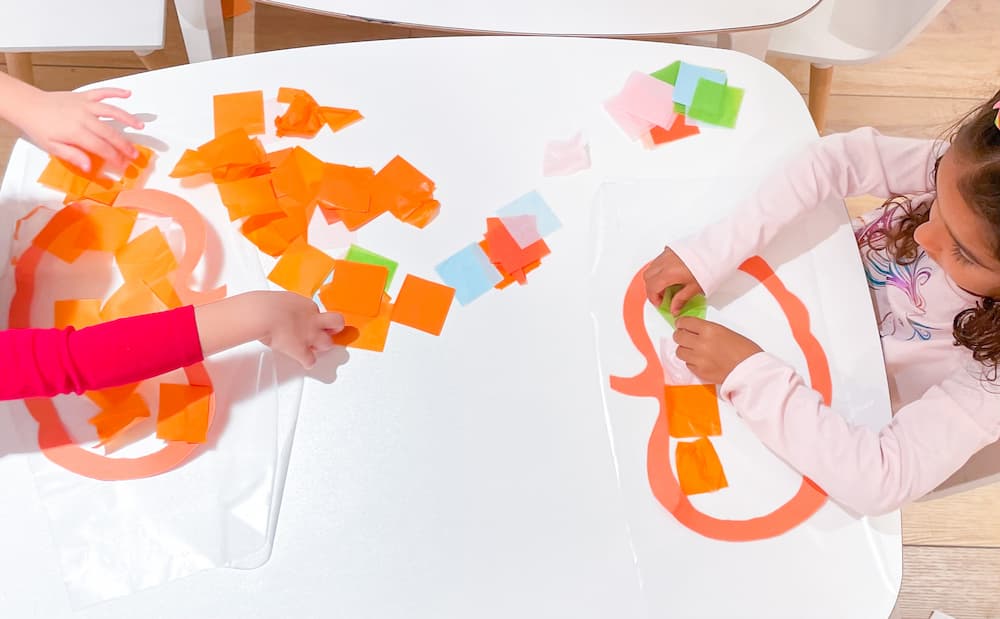
- Cut an equal sized portion of the contact paper and tape it to a desk sticky side up.
- Place the cut-out image on the contact paper.
- Set this activity up side by side with the tissue paper and encourage your child to fill it in.
- When your child is finished, cut another portion of contact paper of equal size and place it sticky side down on top of the image.
- Rub and air pockets out. I found using a cloth (or my sleeve) serves best.
- Lastly, cut out your shape and tape it to the window.
Tips with Miss Charlotte

You can make just about anything with this stained glass activity, and it never gets old. I do one for almost every holiday. From a leaf to pumpkin to tree and heart! You only need a few supplies.
Enjoyed these DIY projects?
Join the Playgarden Online community today for more preschool activities at home!